Hardwiring
a V1 and GPS.
Step3:
Hardwiring the GPS
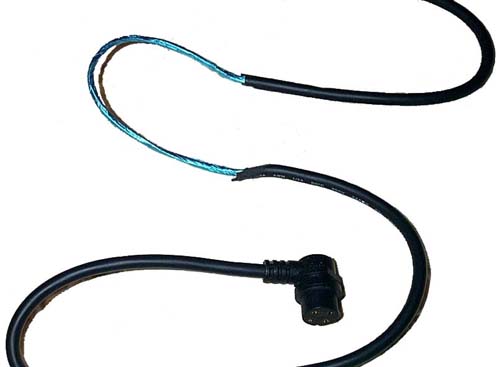
The Garmin Color Street Pilot does
not come with a hardwire cable, however one can be purchased
separately (Garmin Power Data Cable #010-10082-00). This hardwire
cable has a proprietary jack that plugs into the GPS and four
small gauge wires running through a shielded cable.
The wires are designated:
Red (with inline fuse) -
connect to 12volt Power.
Black - Connect to
Ground
White - Connect to optional
laptop Data In.
Brown - Connect to optional
laptop Data Out.
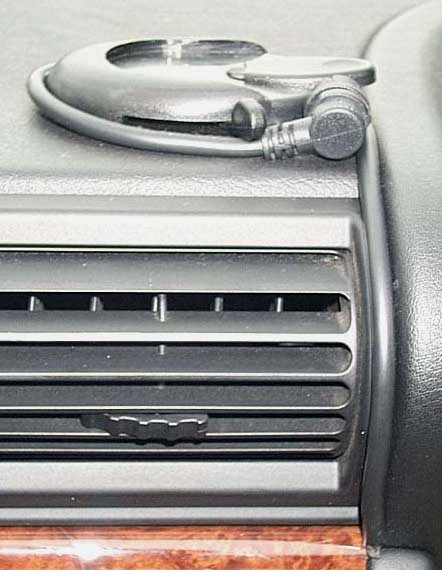
I wanted to hide as much of the
cable as possible without any drilling or plastic surgery to CiZi.
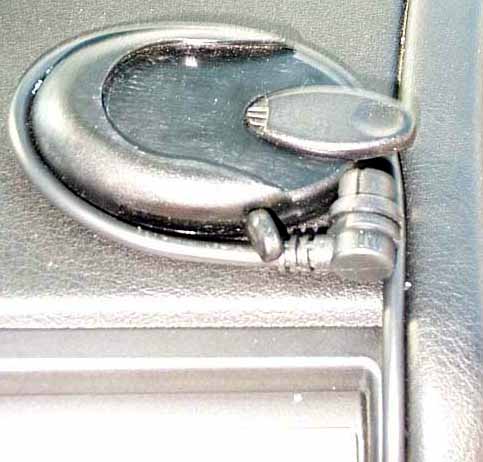
The GPS is mounted on the center dash, offset slightly towards the
passenger side to avoid blocking the rear sensor of the low
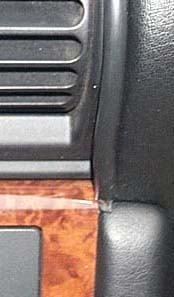
mounted V1. There is a tiny
opening below the center air vent,
in the corner where the woodgrain console meets the vinyl dash and
side panel. This opening will allow the cable to be fed to the
magic area below the HVAC to mate up with the snap connectors for
ground and power.
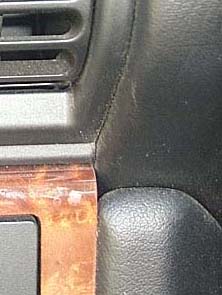
The access opening is too small to
insert the hardwire cable and my first thought was to strip the
rubber sleeve off the cable and feed the four tiny wires behind
the console. Problem #1, I wanted to attach the snap connectors to
the GPS wires prior to installation and I was uncertain if the
snap connectors would fit through the opening below the air vent.
Problem #2, the hardwire cable had a metallic shield wrapped
between the rubber sleeve and the wires. There shouldn't be much
of a problem with electrical interference behind the console, but
I didn't want to take any chances.
A second plan emerged. If I
stripped
the rubber sleeve off a
small section of the cable, I could flatten the shielding and slip
it through the area where the side panel meets the top of the
console, sliding it into the area like dental
floss.
The procedure below assumes that you
have the glovebox removed. If the glovebox is left in place, you
can unscrew the passenger console side panel, remove the small
cover for access to the OBC and CAREFULLY pull the side panel back
to allow access to the area behind the console. It is extremely
easy to scratch the glovebox if it is left in place.

